External Display from an iPad LCD, Part 2
Last post I showed how all the electronics stuff would work for the iPad screen. After getting screen working it took me a few months to actually sit down and assemble everything. Once I got around to it, it just took one evening to physically put everything together.
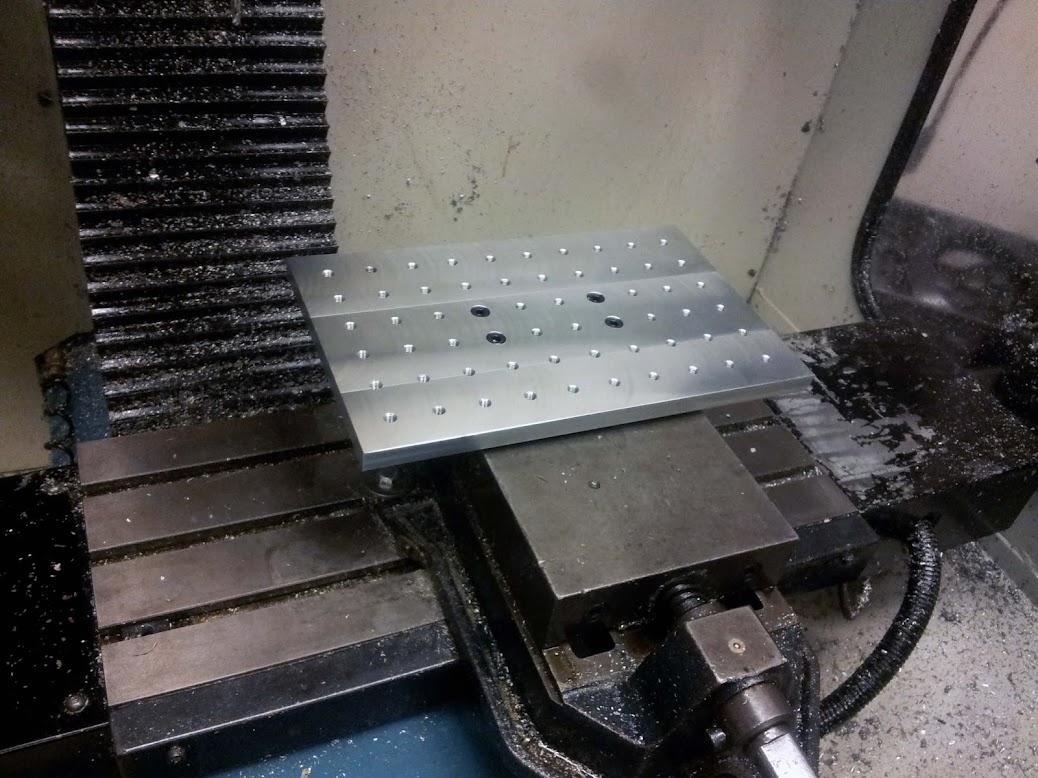
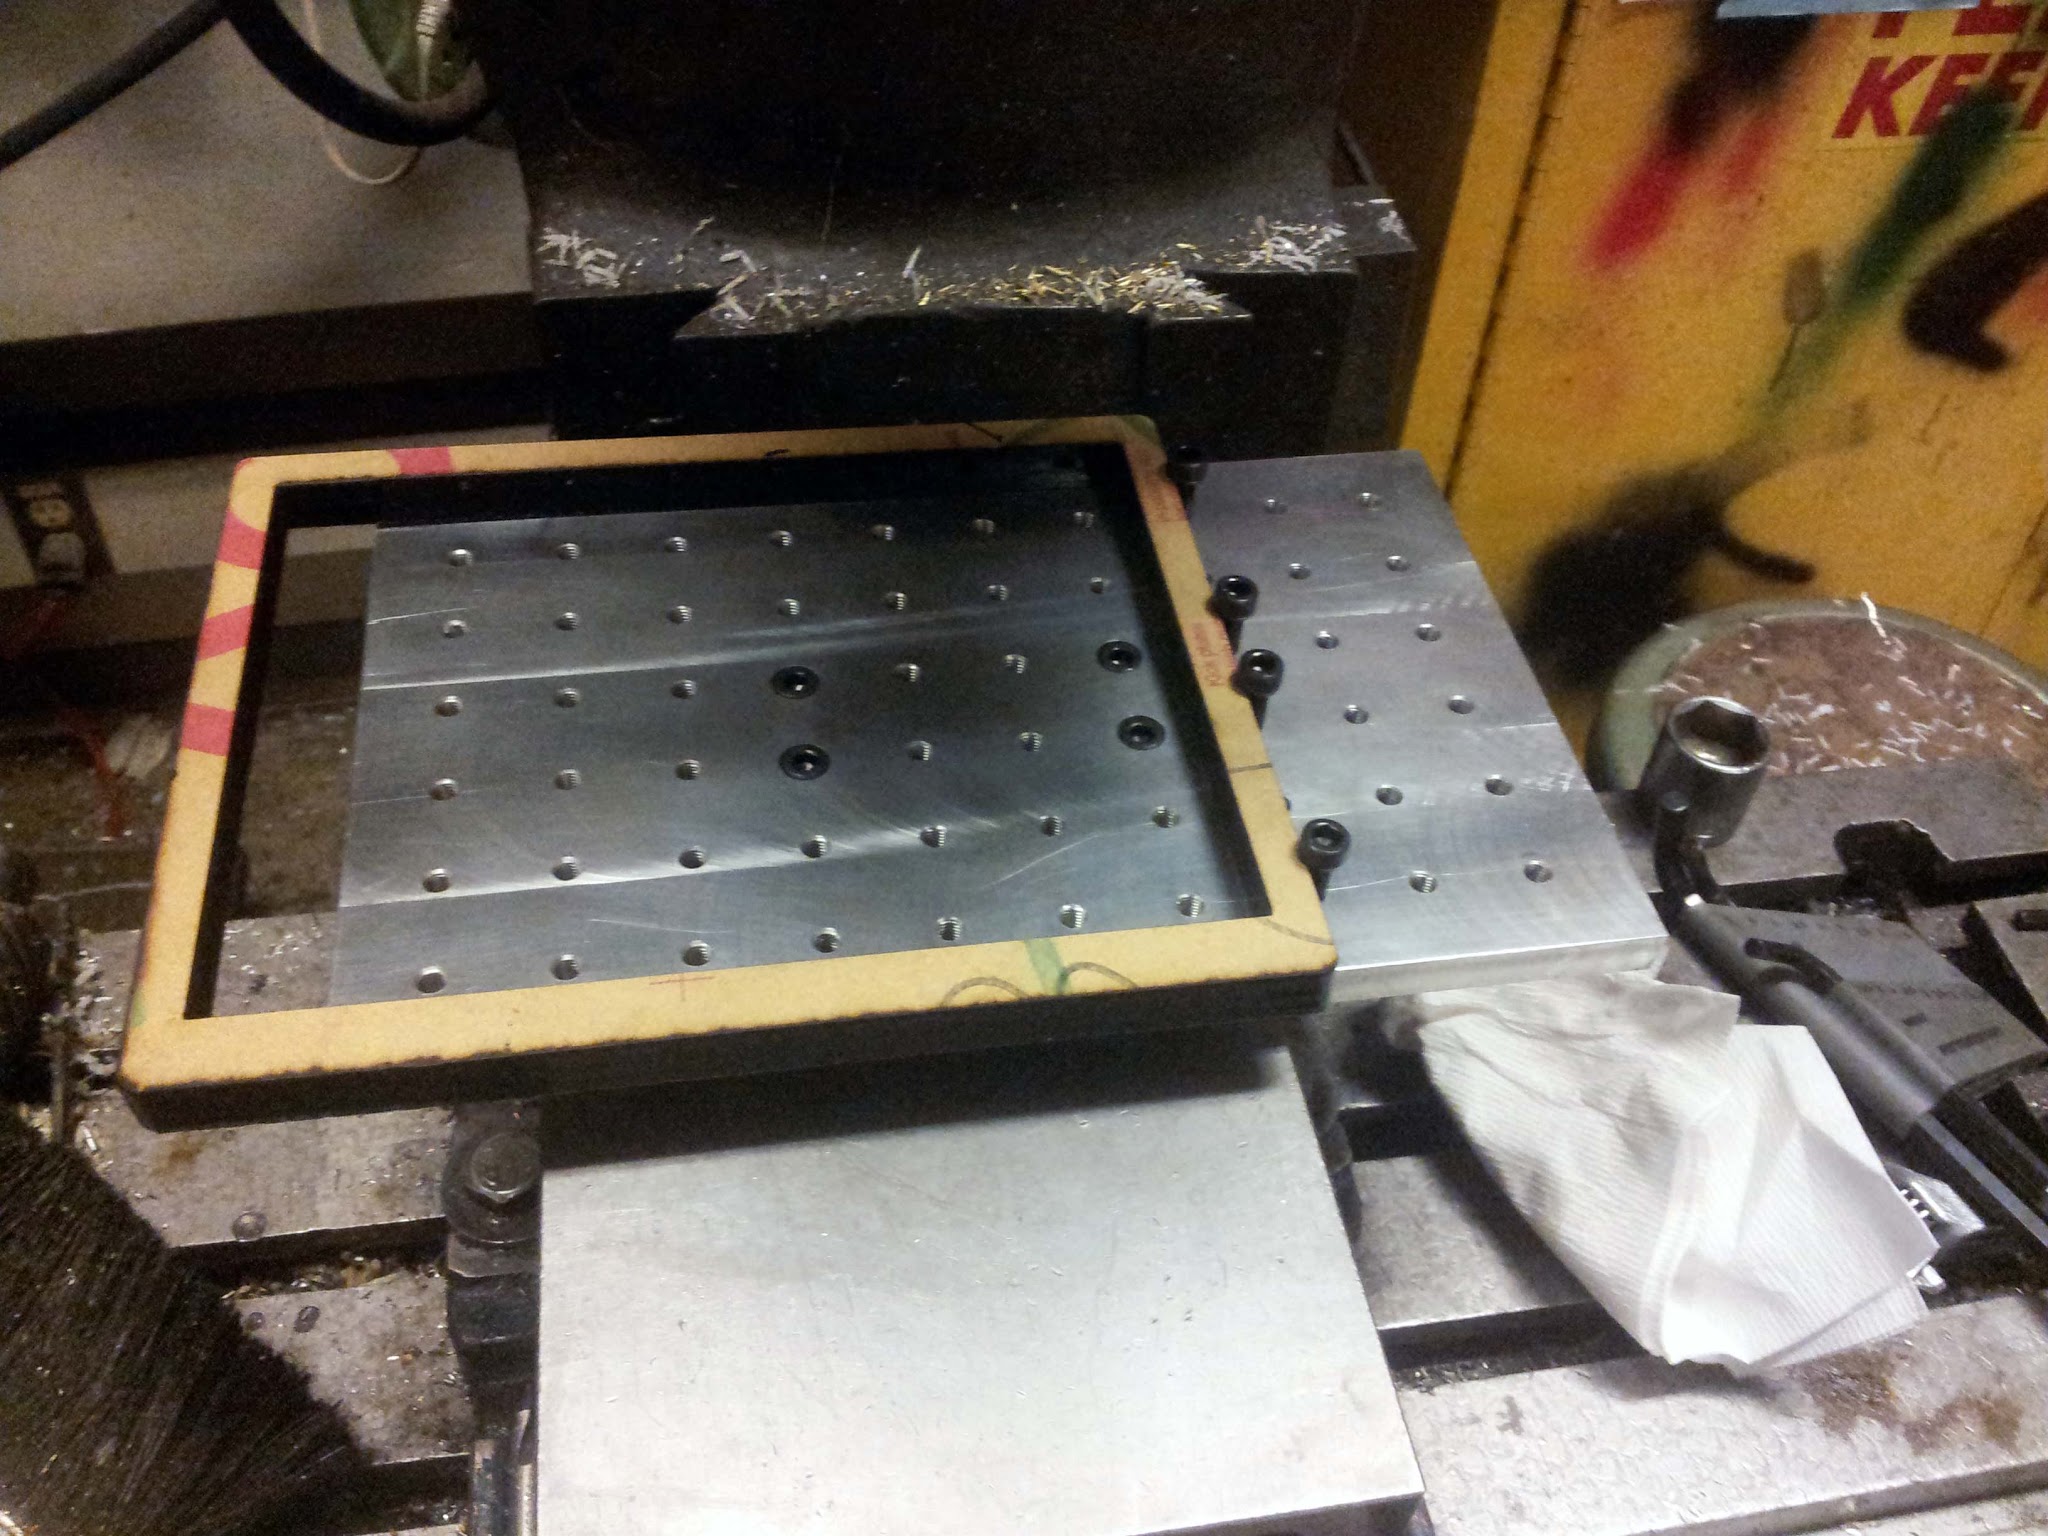
I first laser cut a bezel for the screen out of some thick black acrylic. I then milled out a recess for the screen in the acrylic bezel. I fixed the acrylic to the mill using this fancy milling fixture I machined a while back.
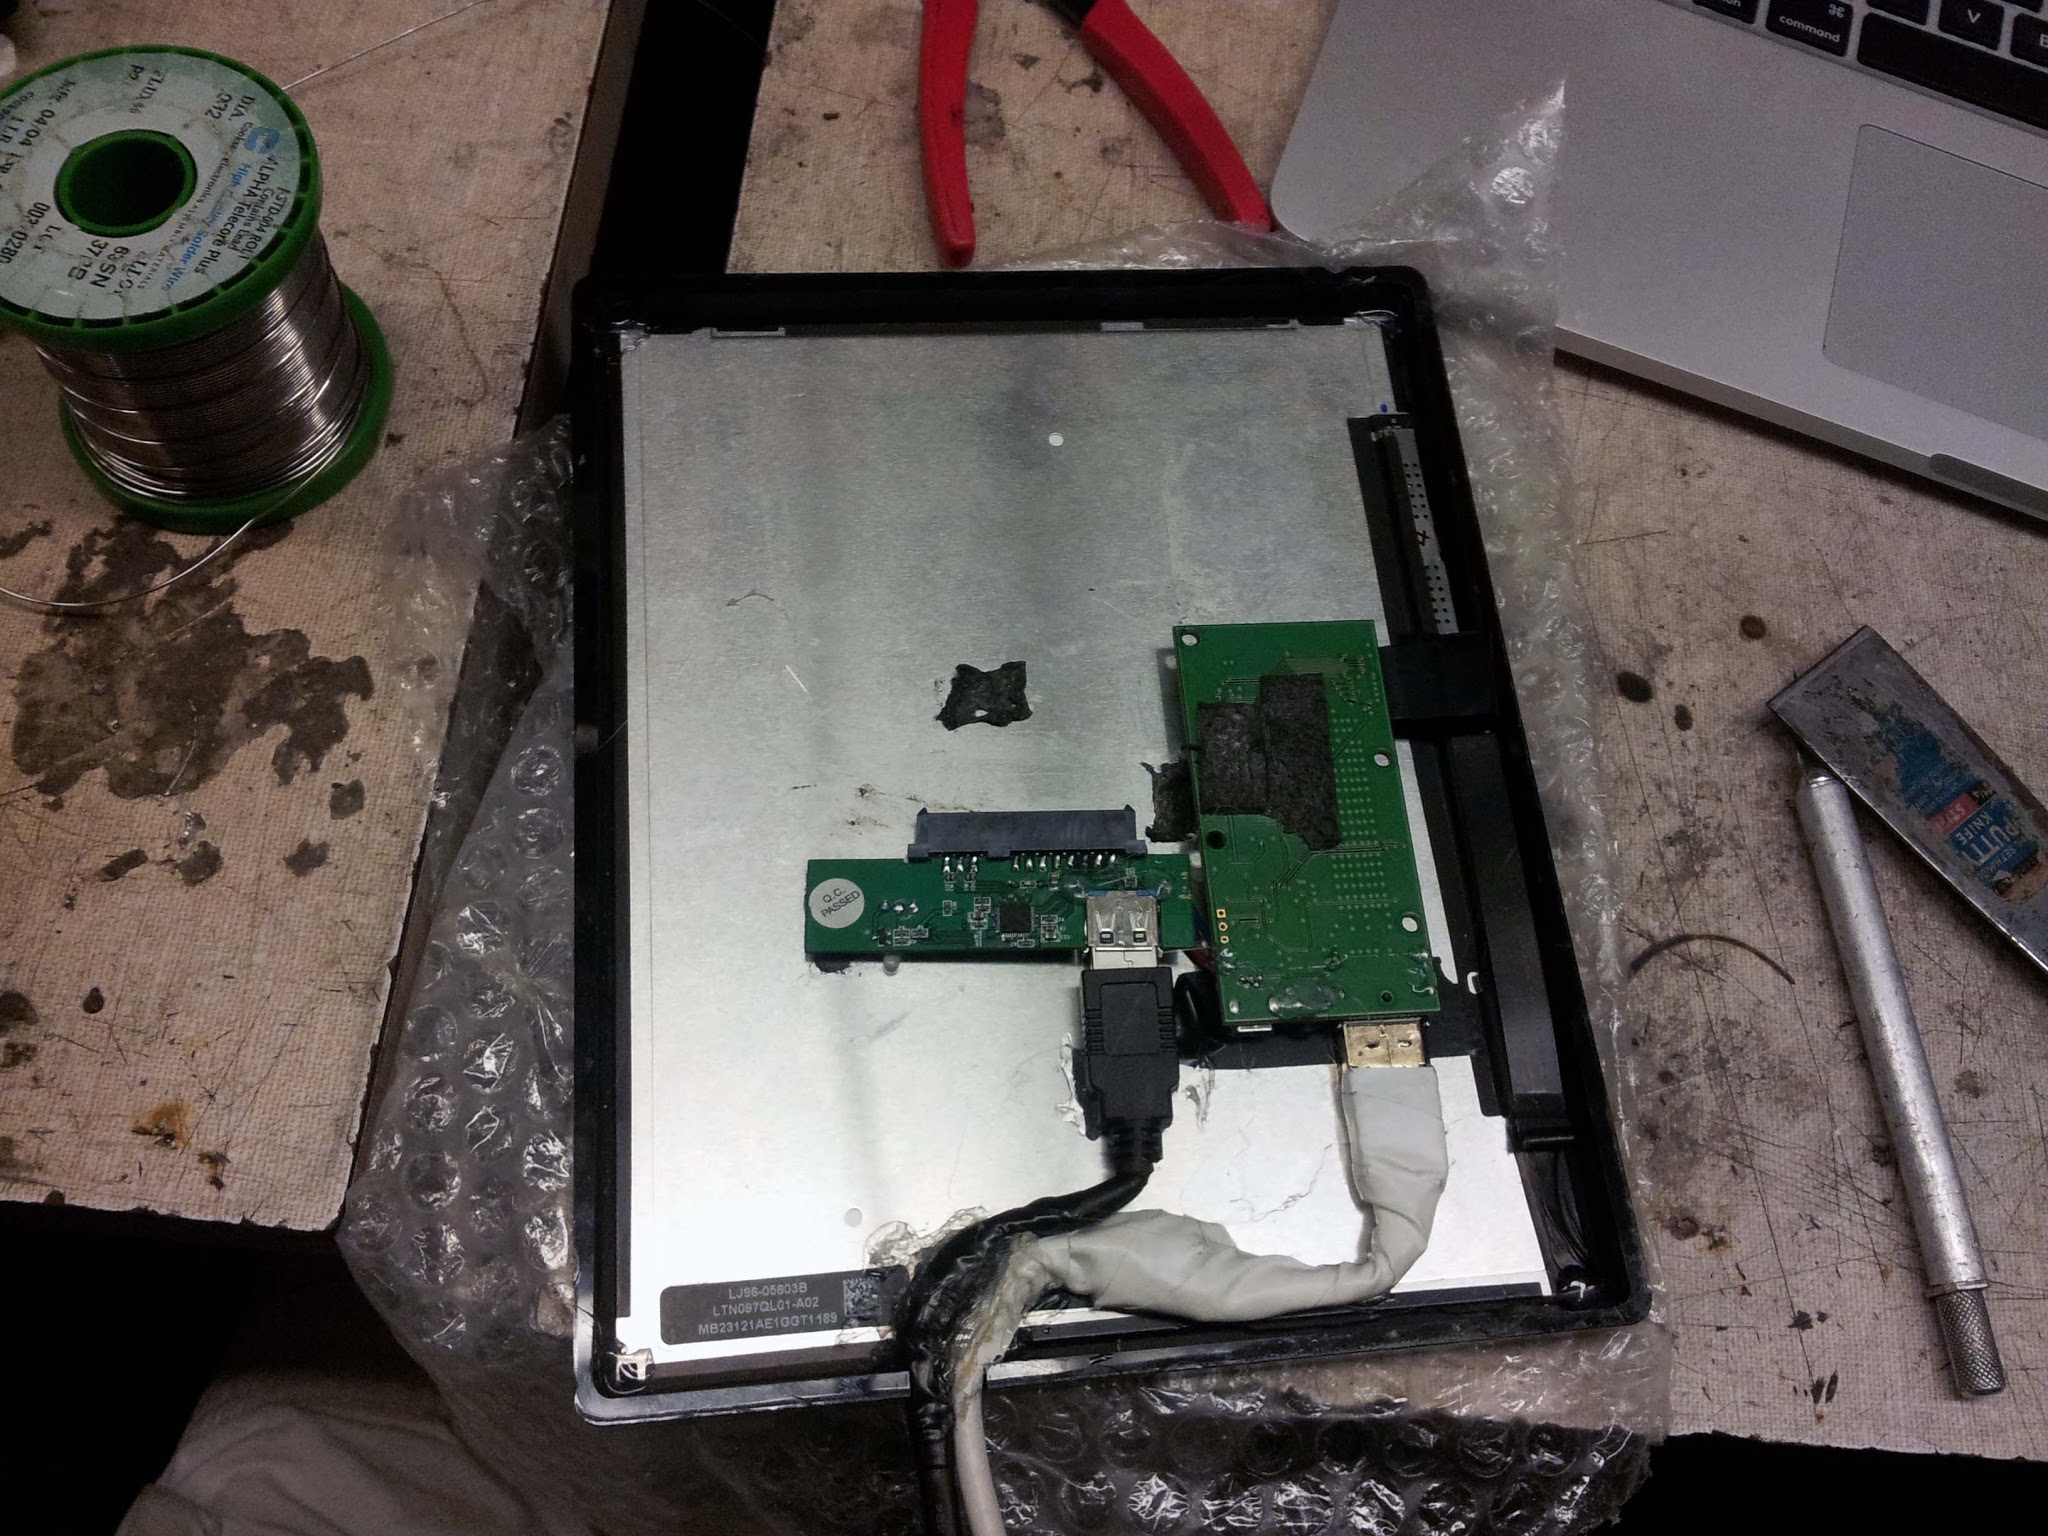
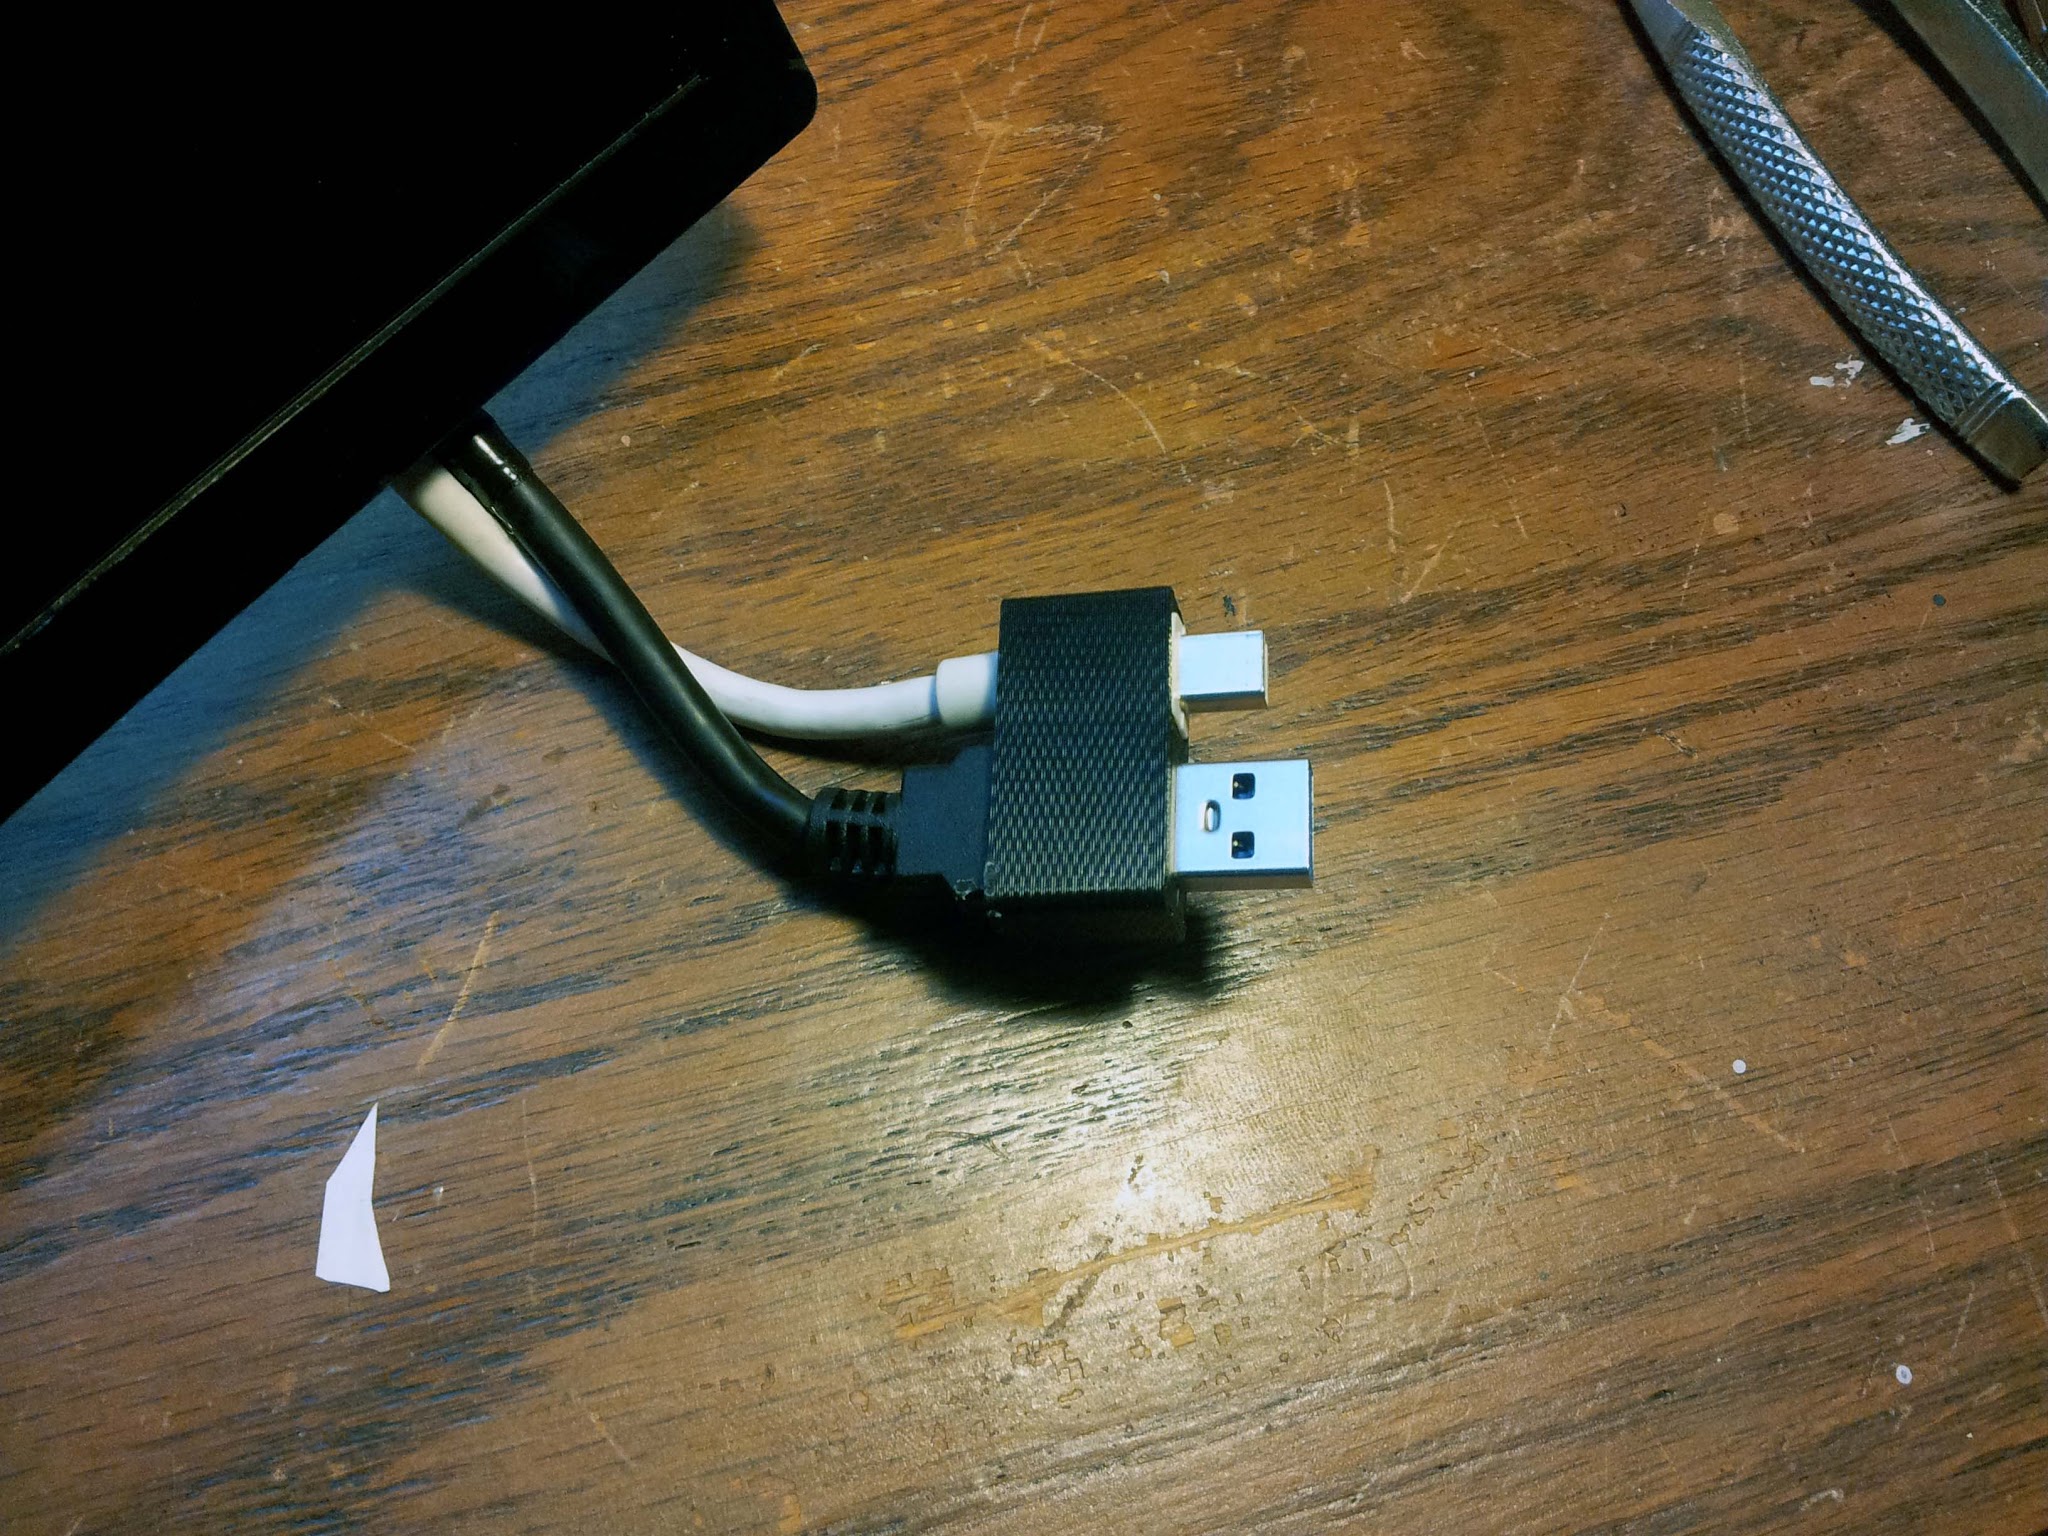
Rather than trying to desolder the Displayport jack from the LCD controller, I instead just cut and spliced a Displayport cable down to 8". Same with the USB 3 cable. Tip: Splicing Displayport cables is terrible. There's an absurd amount of shielding, along with the ~20 conductors you have to deal with. Avoid if possible.
The thickest part of the entire assembly is connectors. If this project was redone without internal connectors and with custom lower-profile electronics, it could easily be built to iPad-thickness.
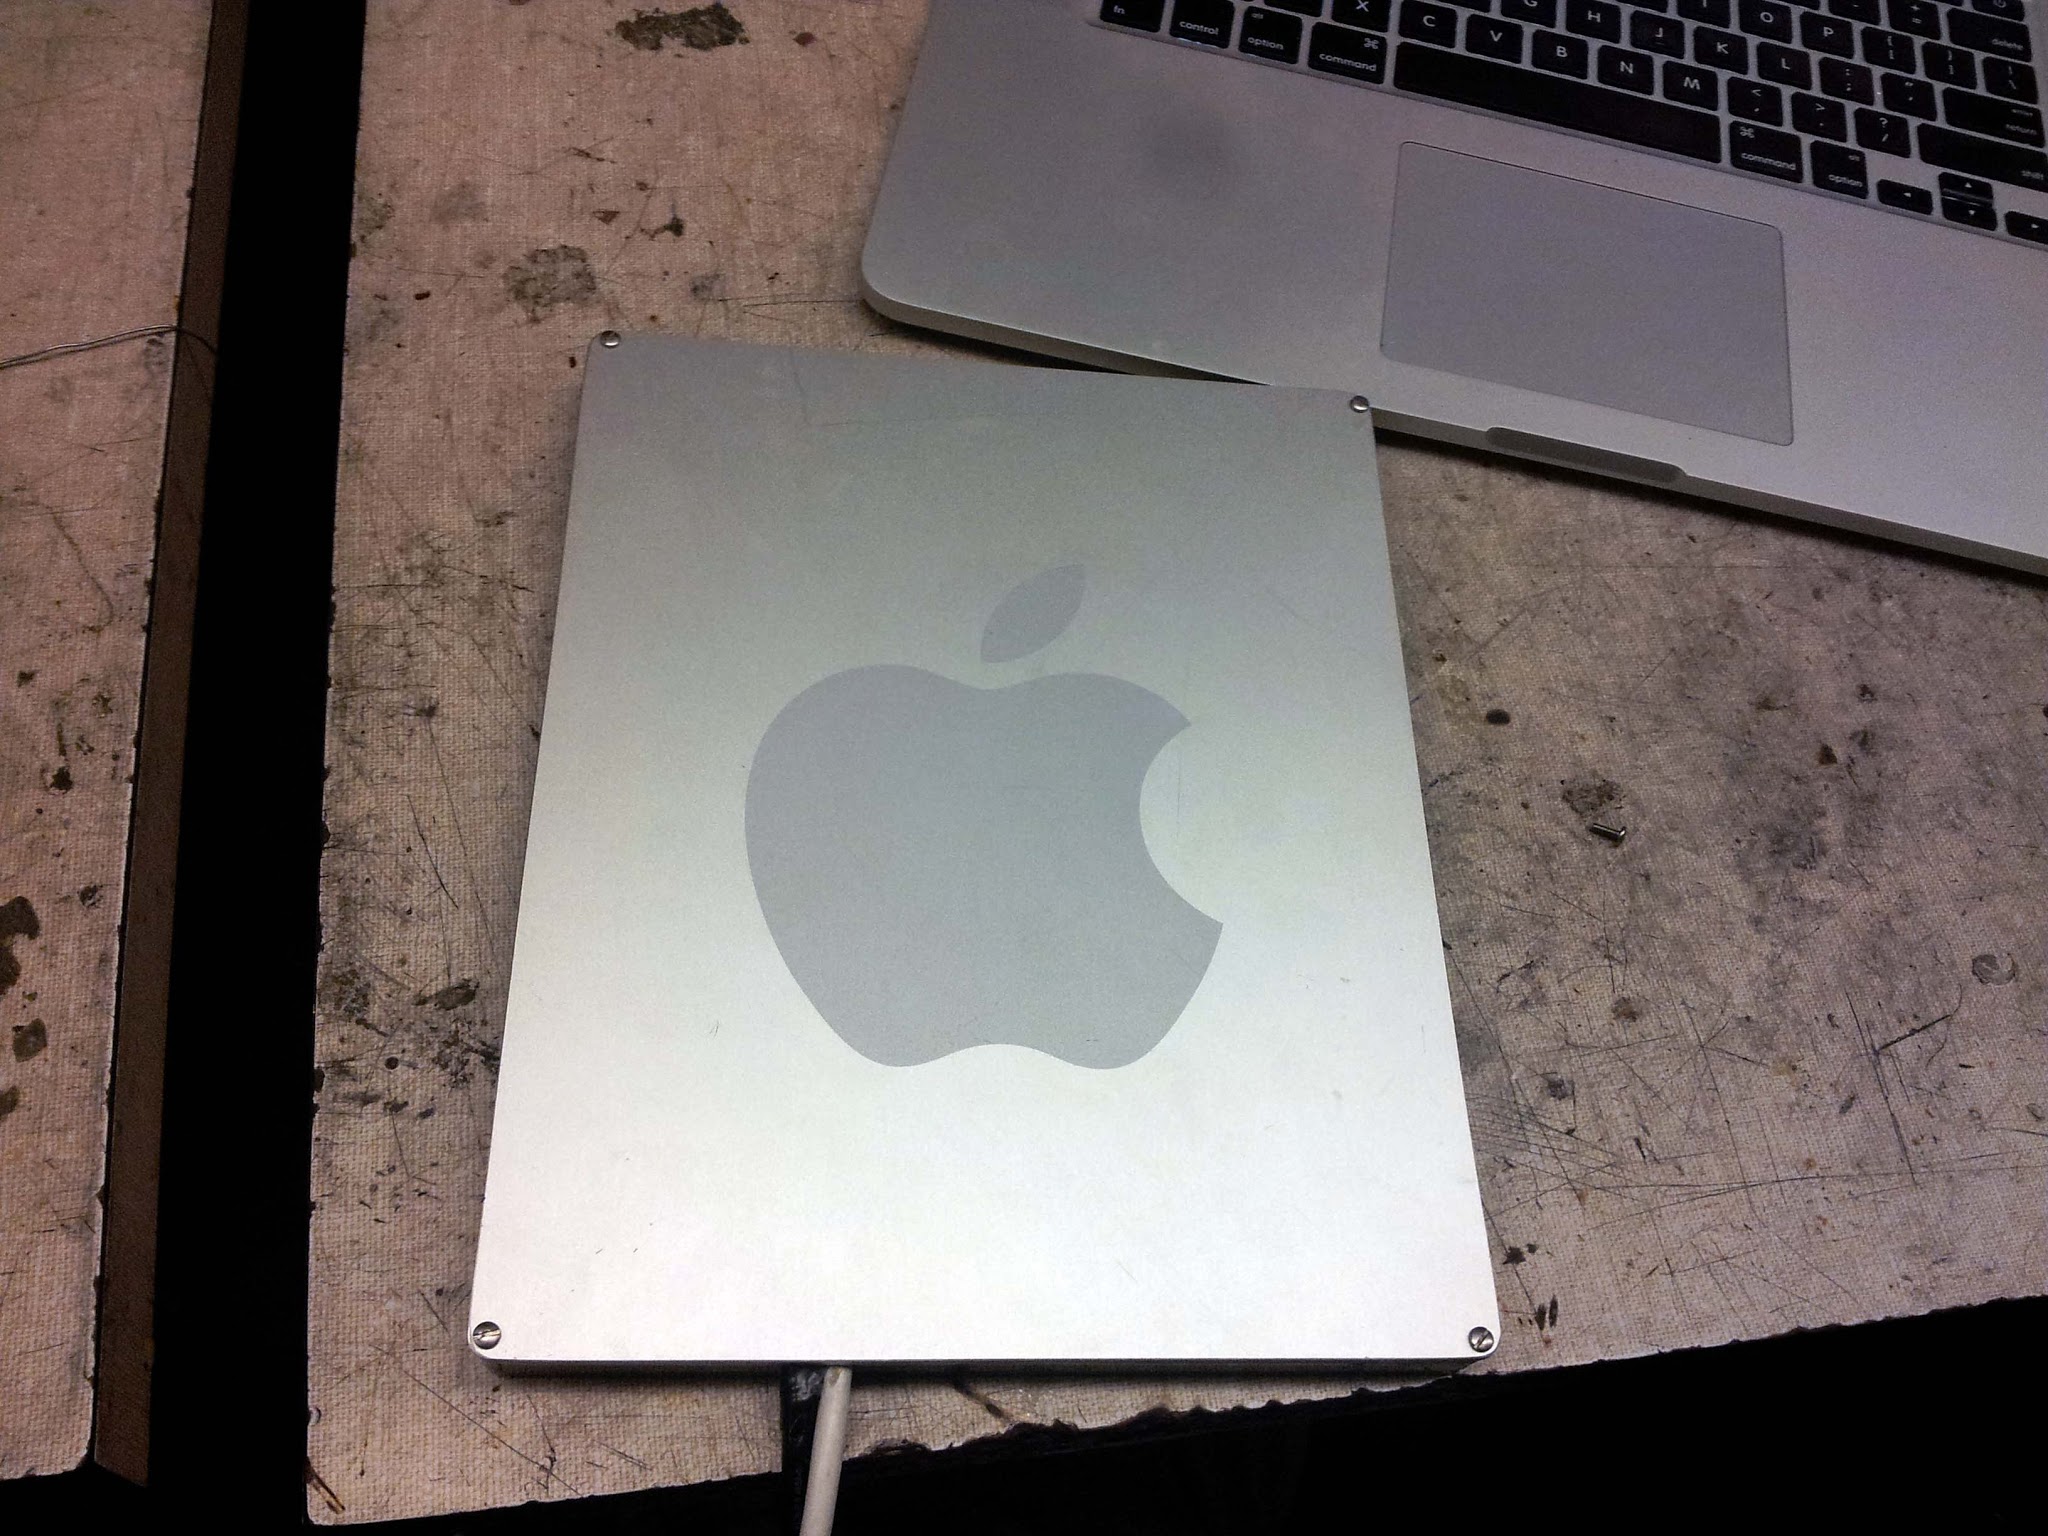
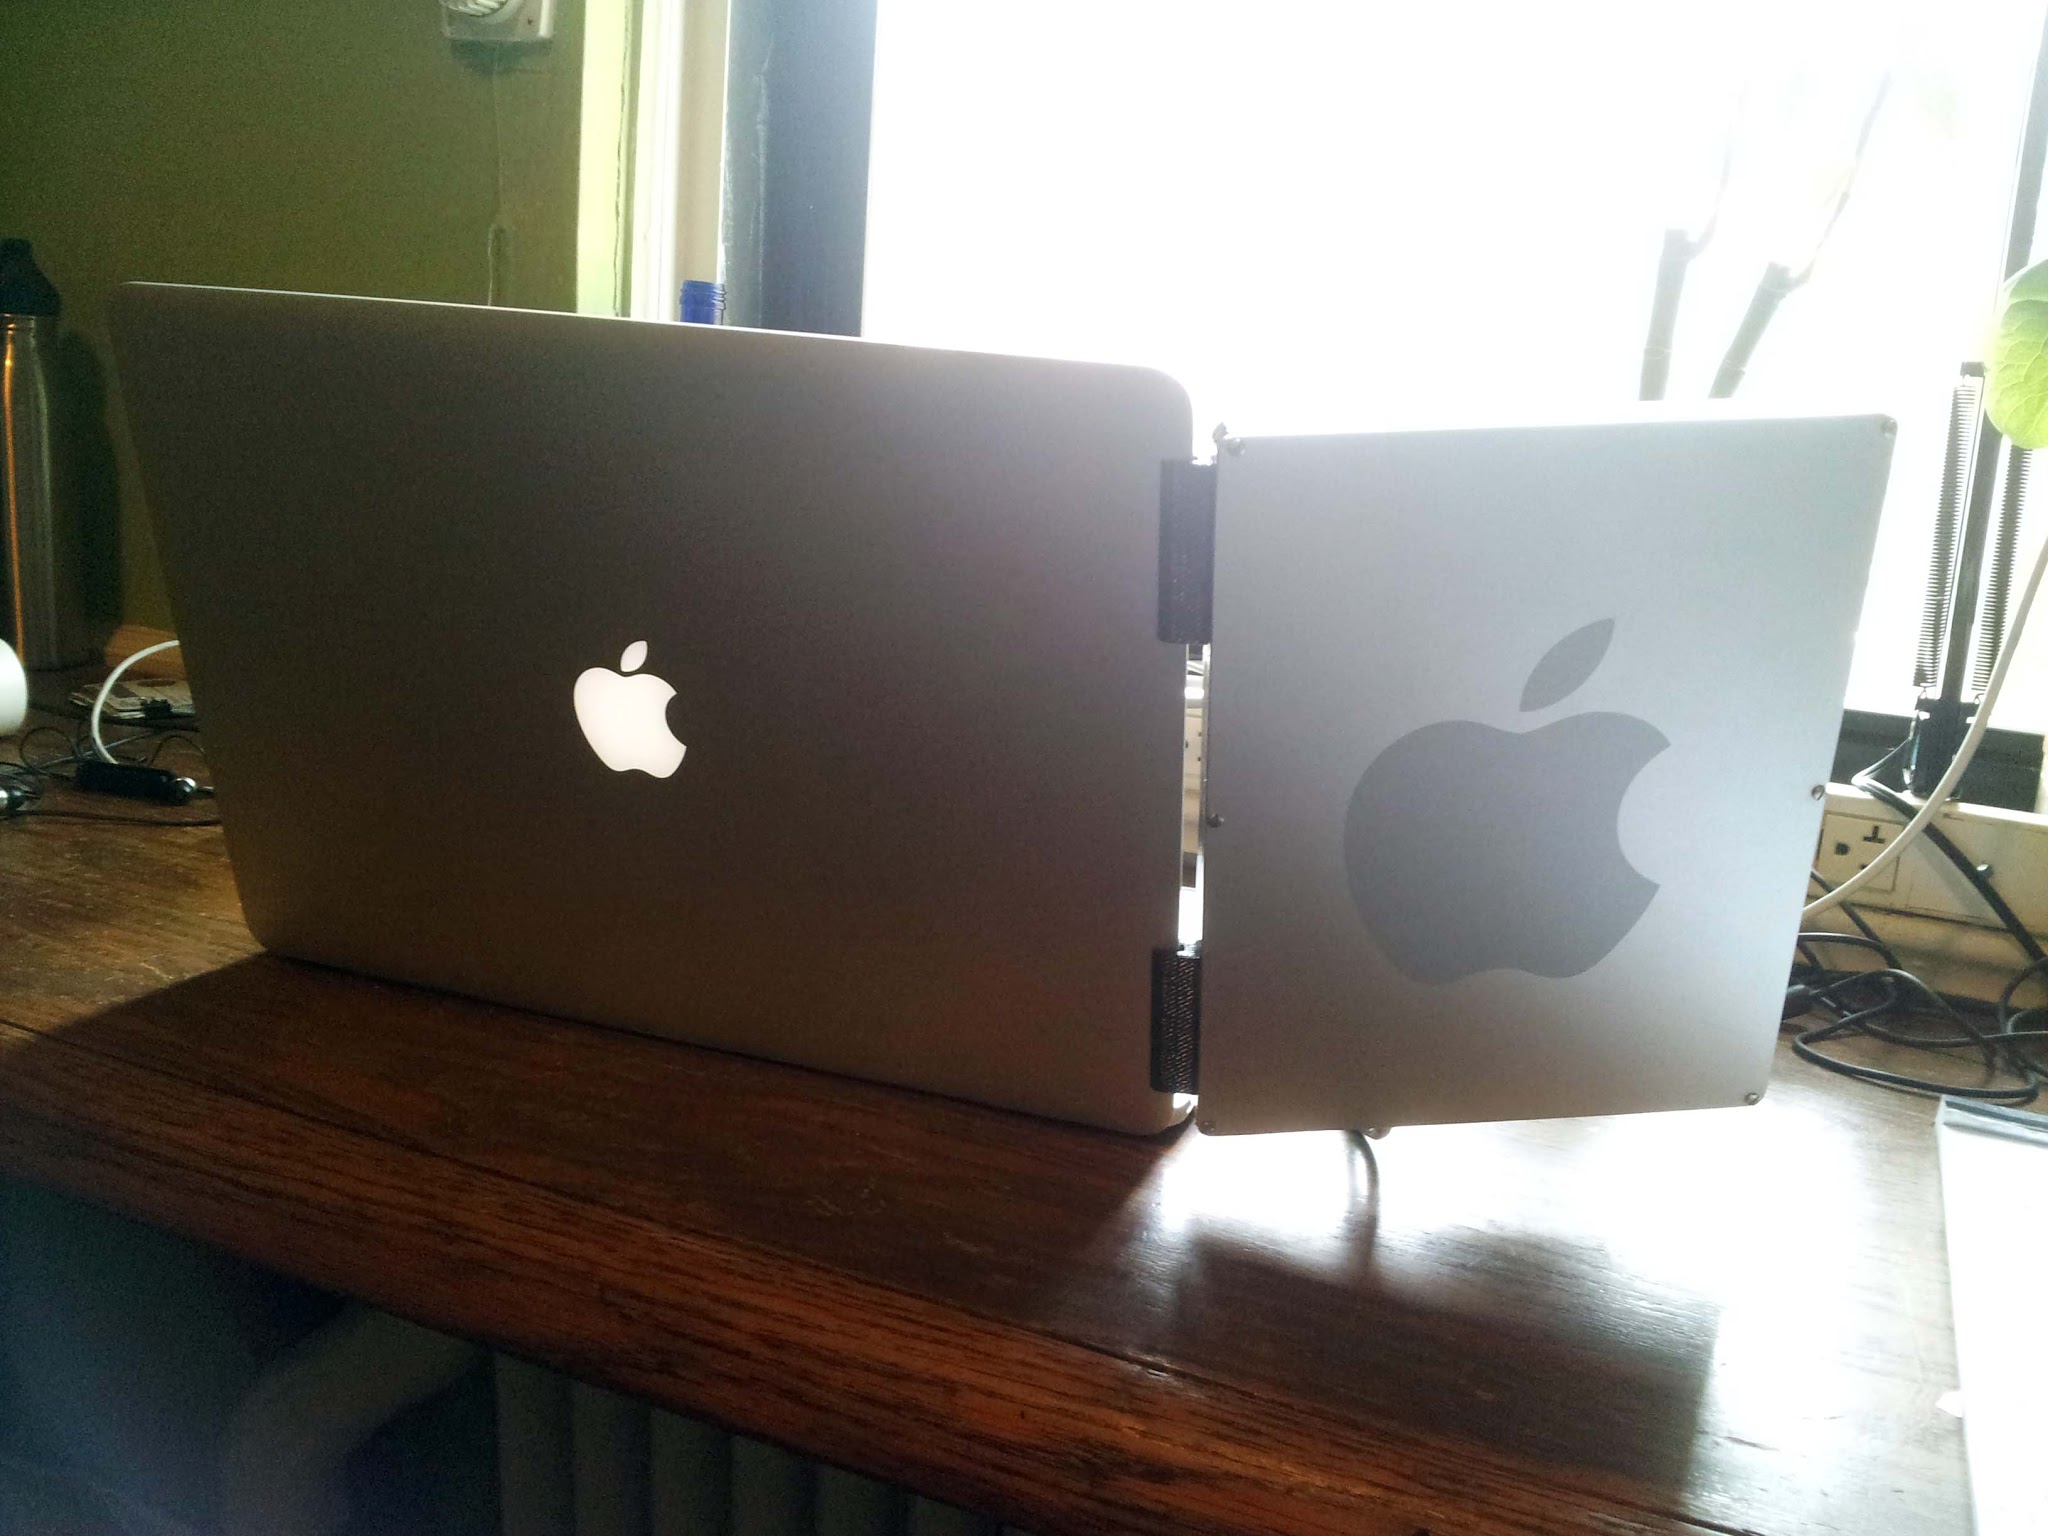
For the back panel, I used the side panel of a PowerMac G5 case. The 1/8" thick aluminum sheet is absolute overkill for this application, but I couldn't resist the anodized apple on the back. A more reasonable material may be the back of a broken macbook screen, which would be much thinner and lighter.
I briefly considered just gluing the entire assembly together (it would have been a very Apple thing to do) but then came to my senses and drilled and tapped some holes to screw it together. Eventually I'll get some flat cap screws and countersink them.
To turn the Mini Displayport and USB connector into one piece, I 3D-printed a housing the two connectors press-fit into, at the appropriate spacing for my laptop's ports:
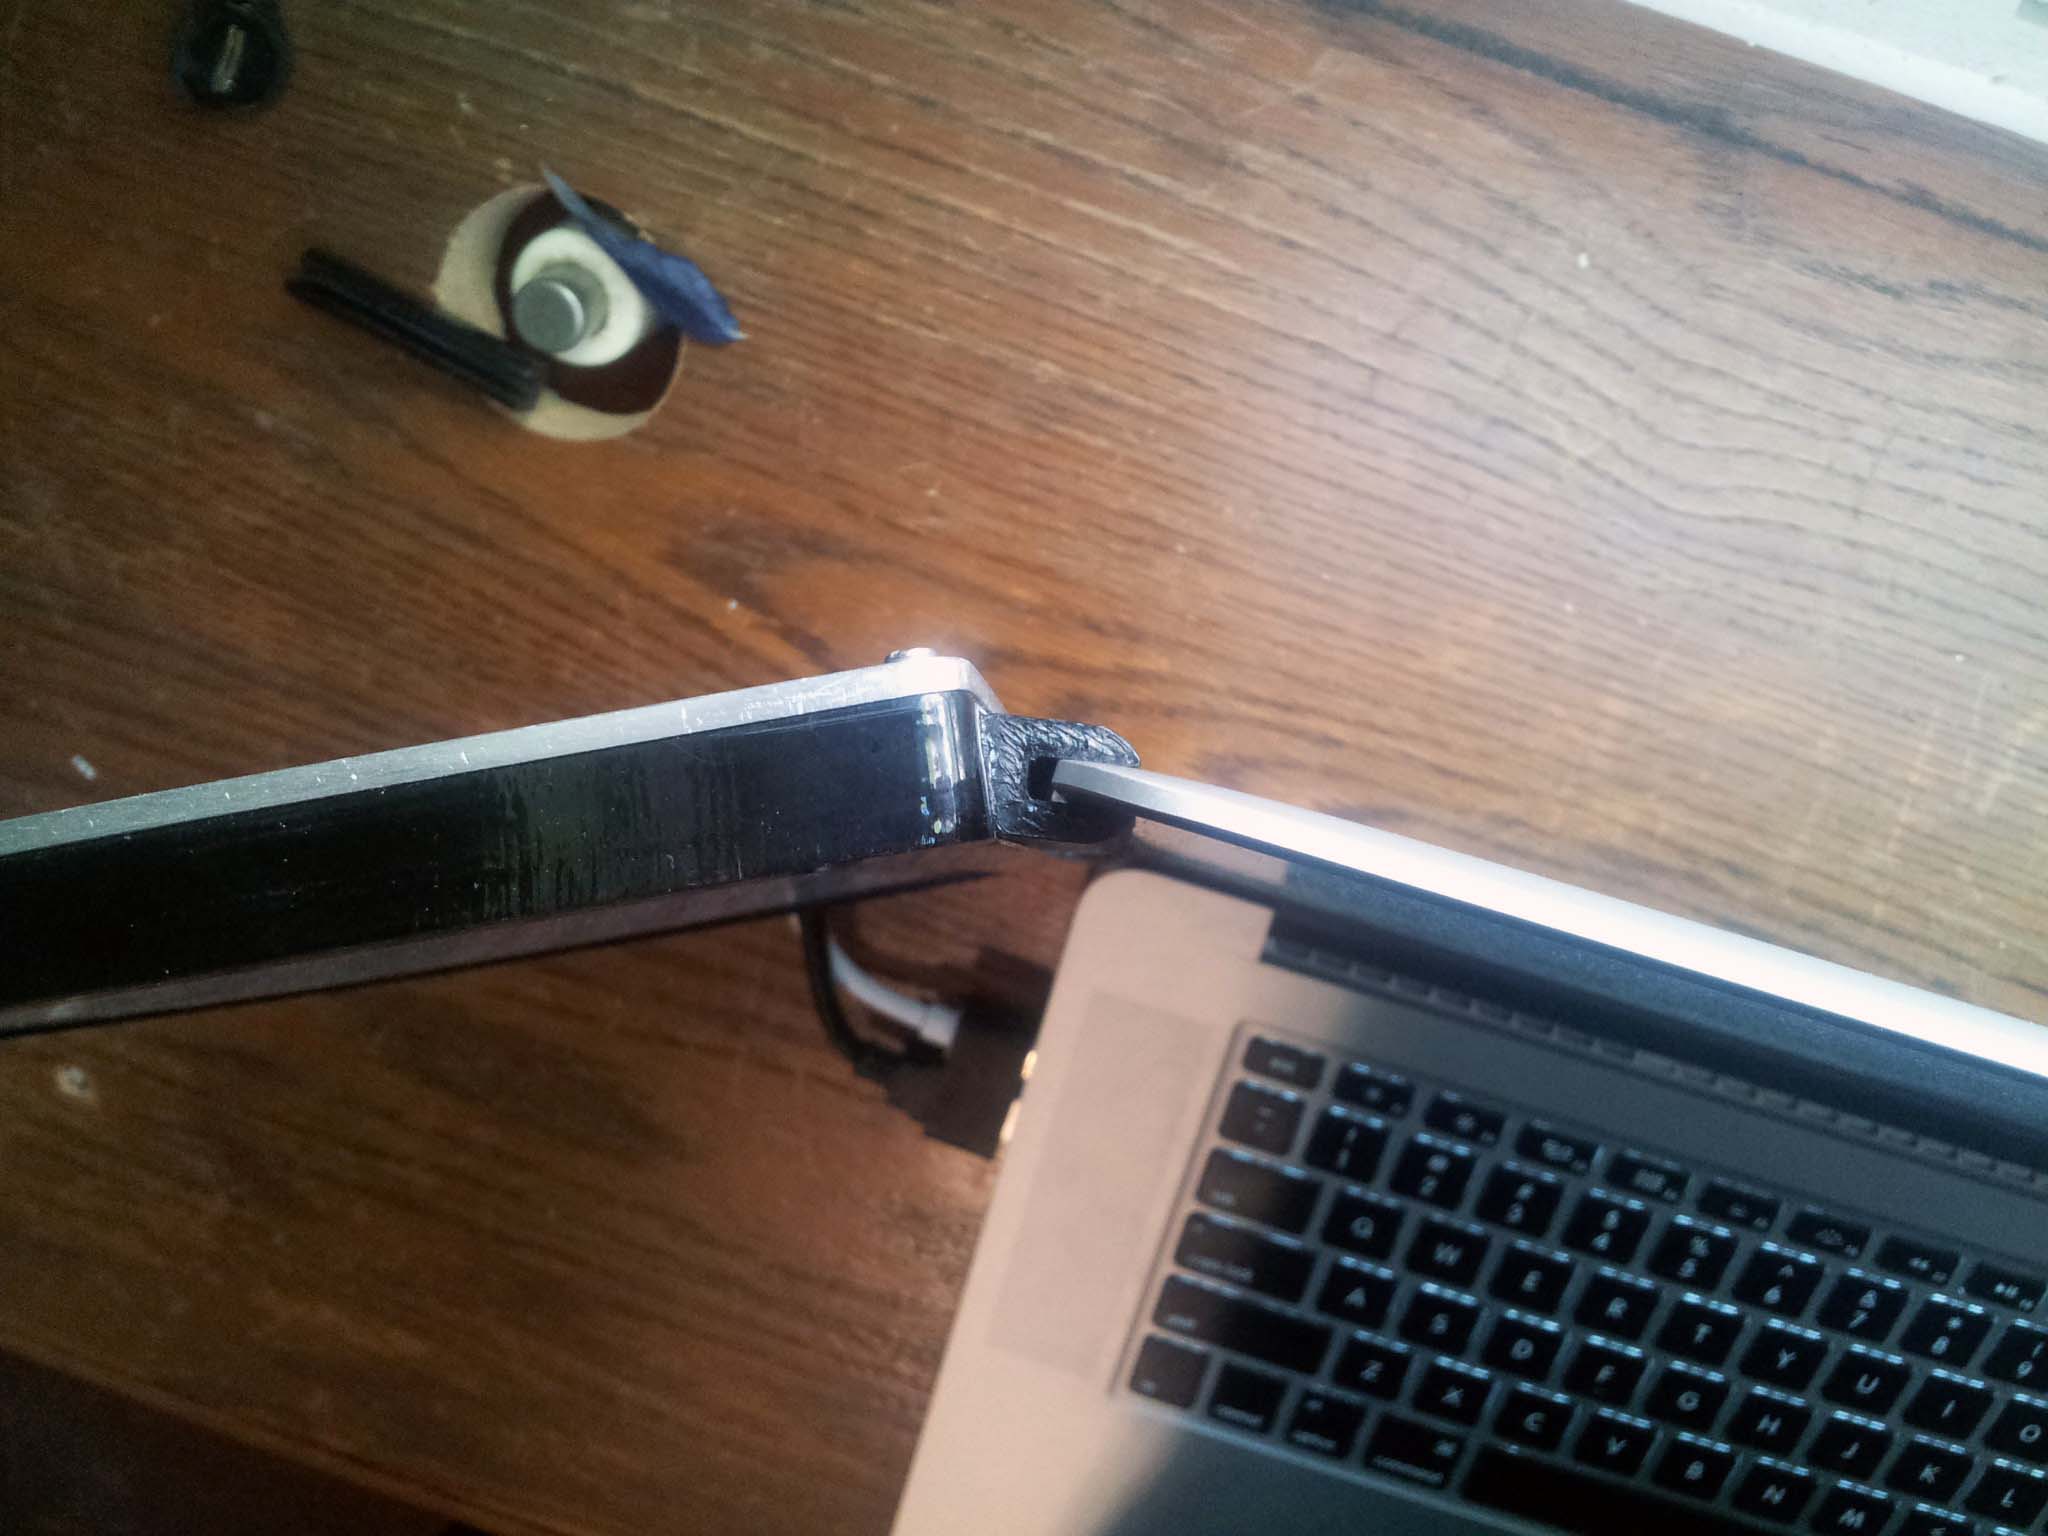
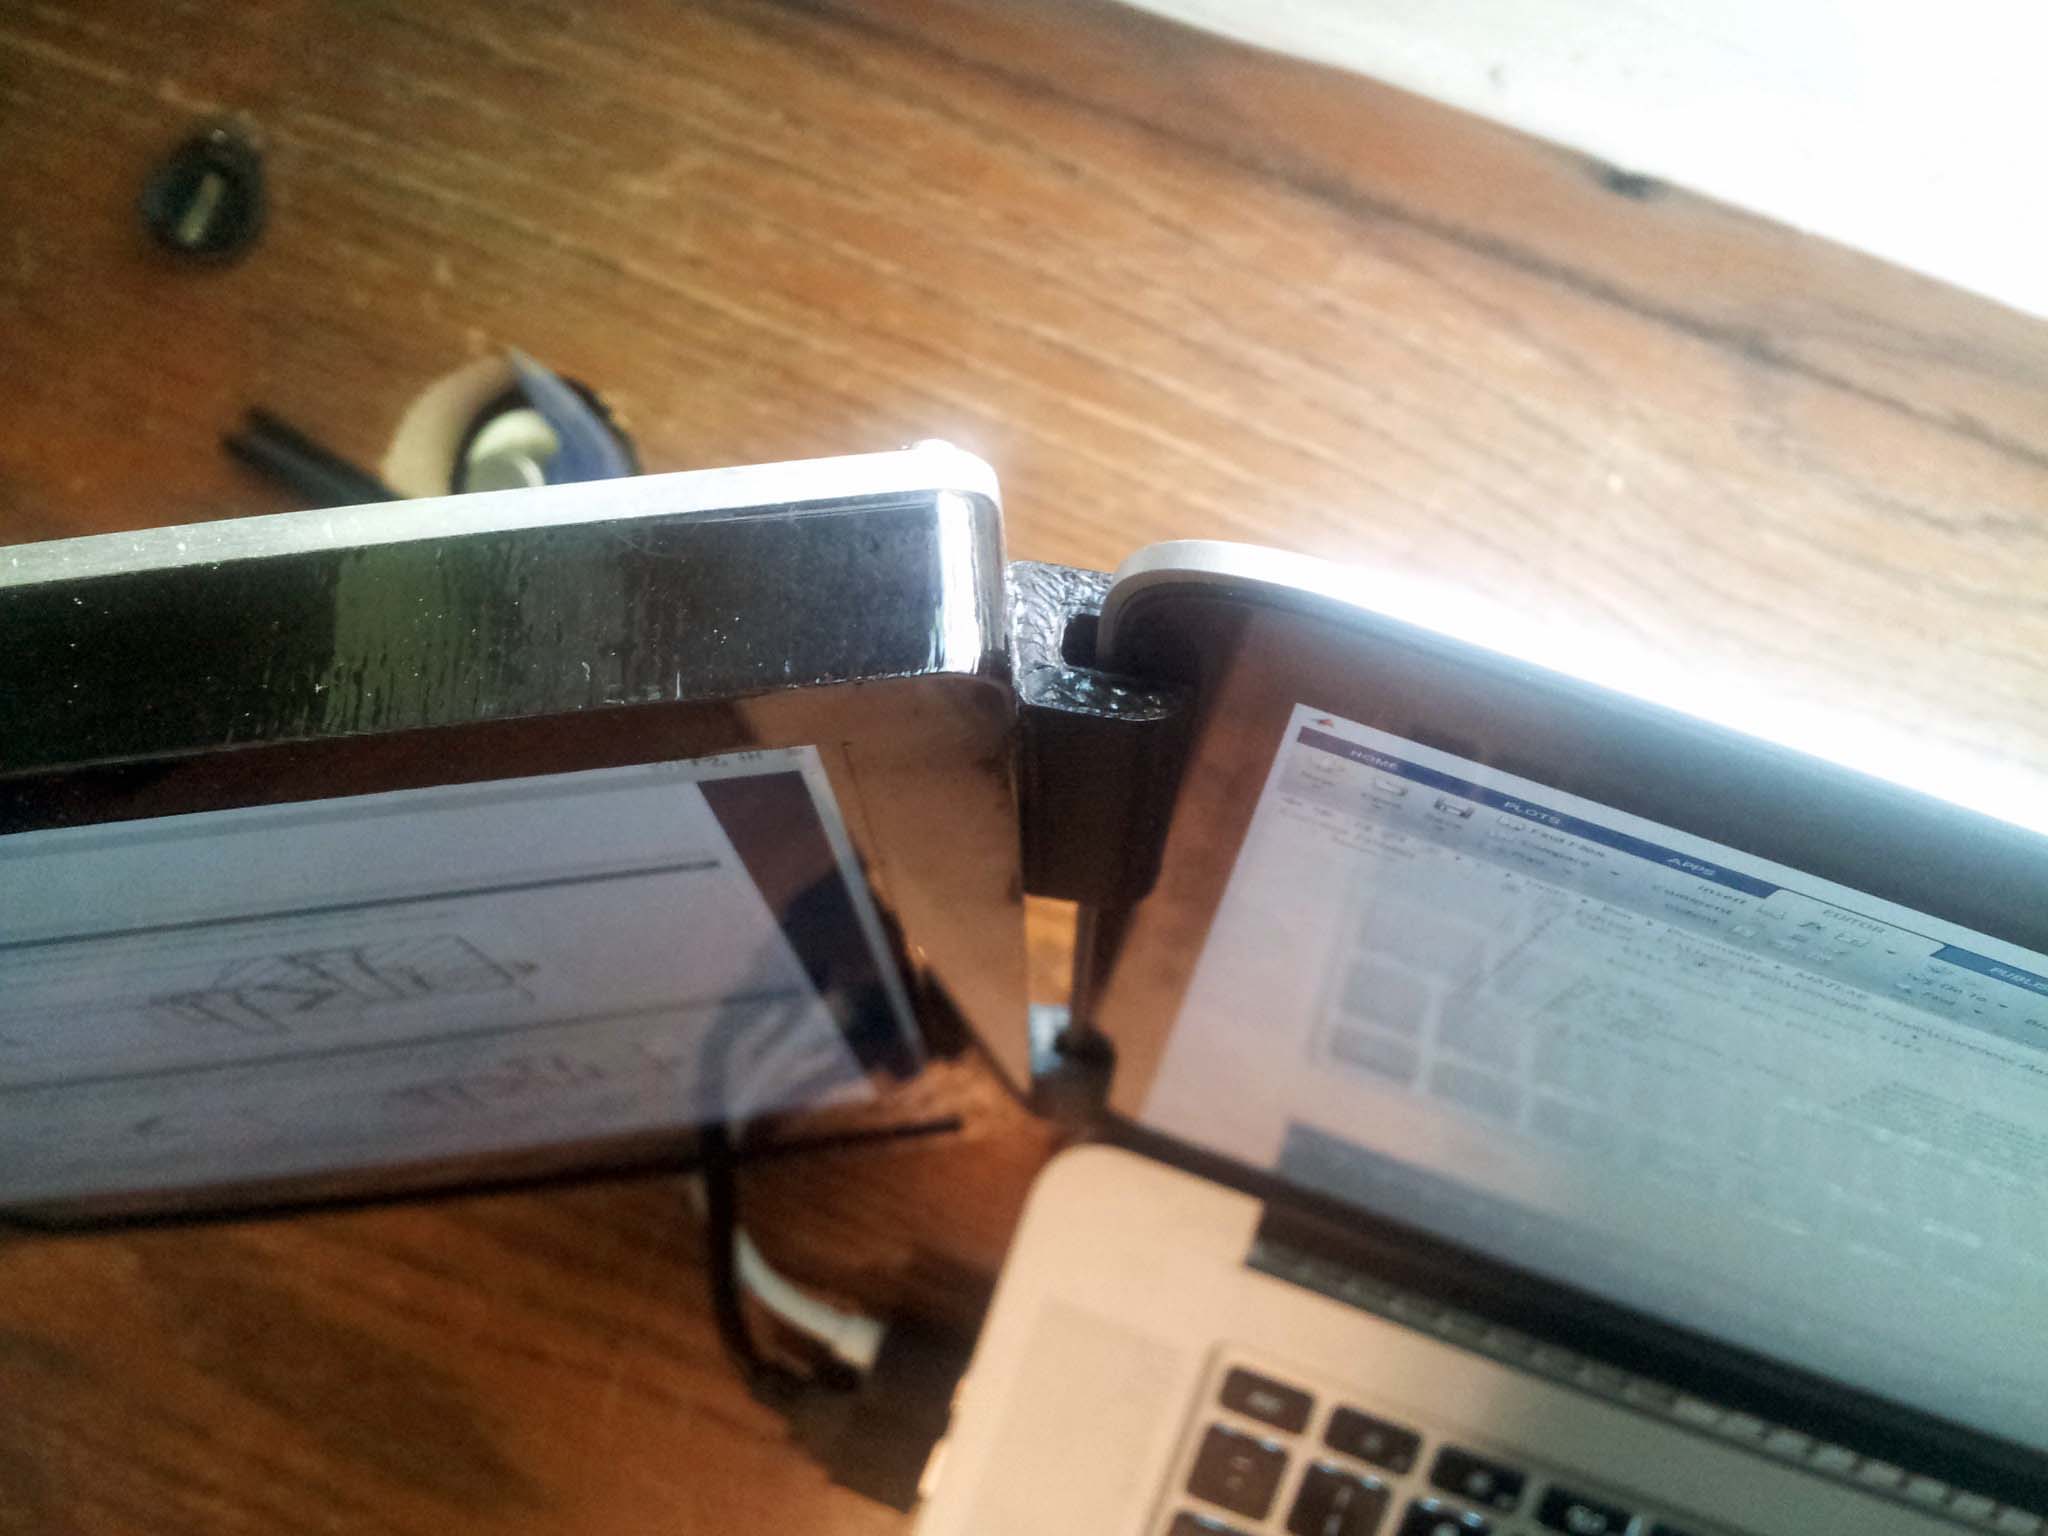
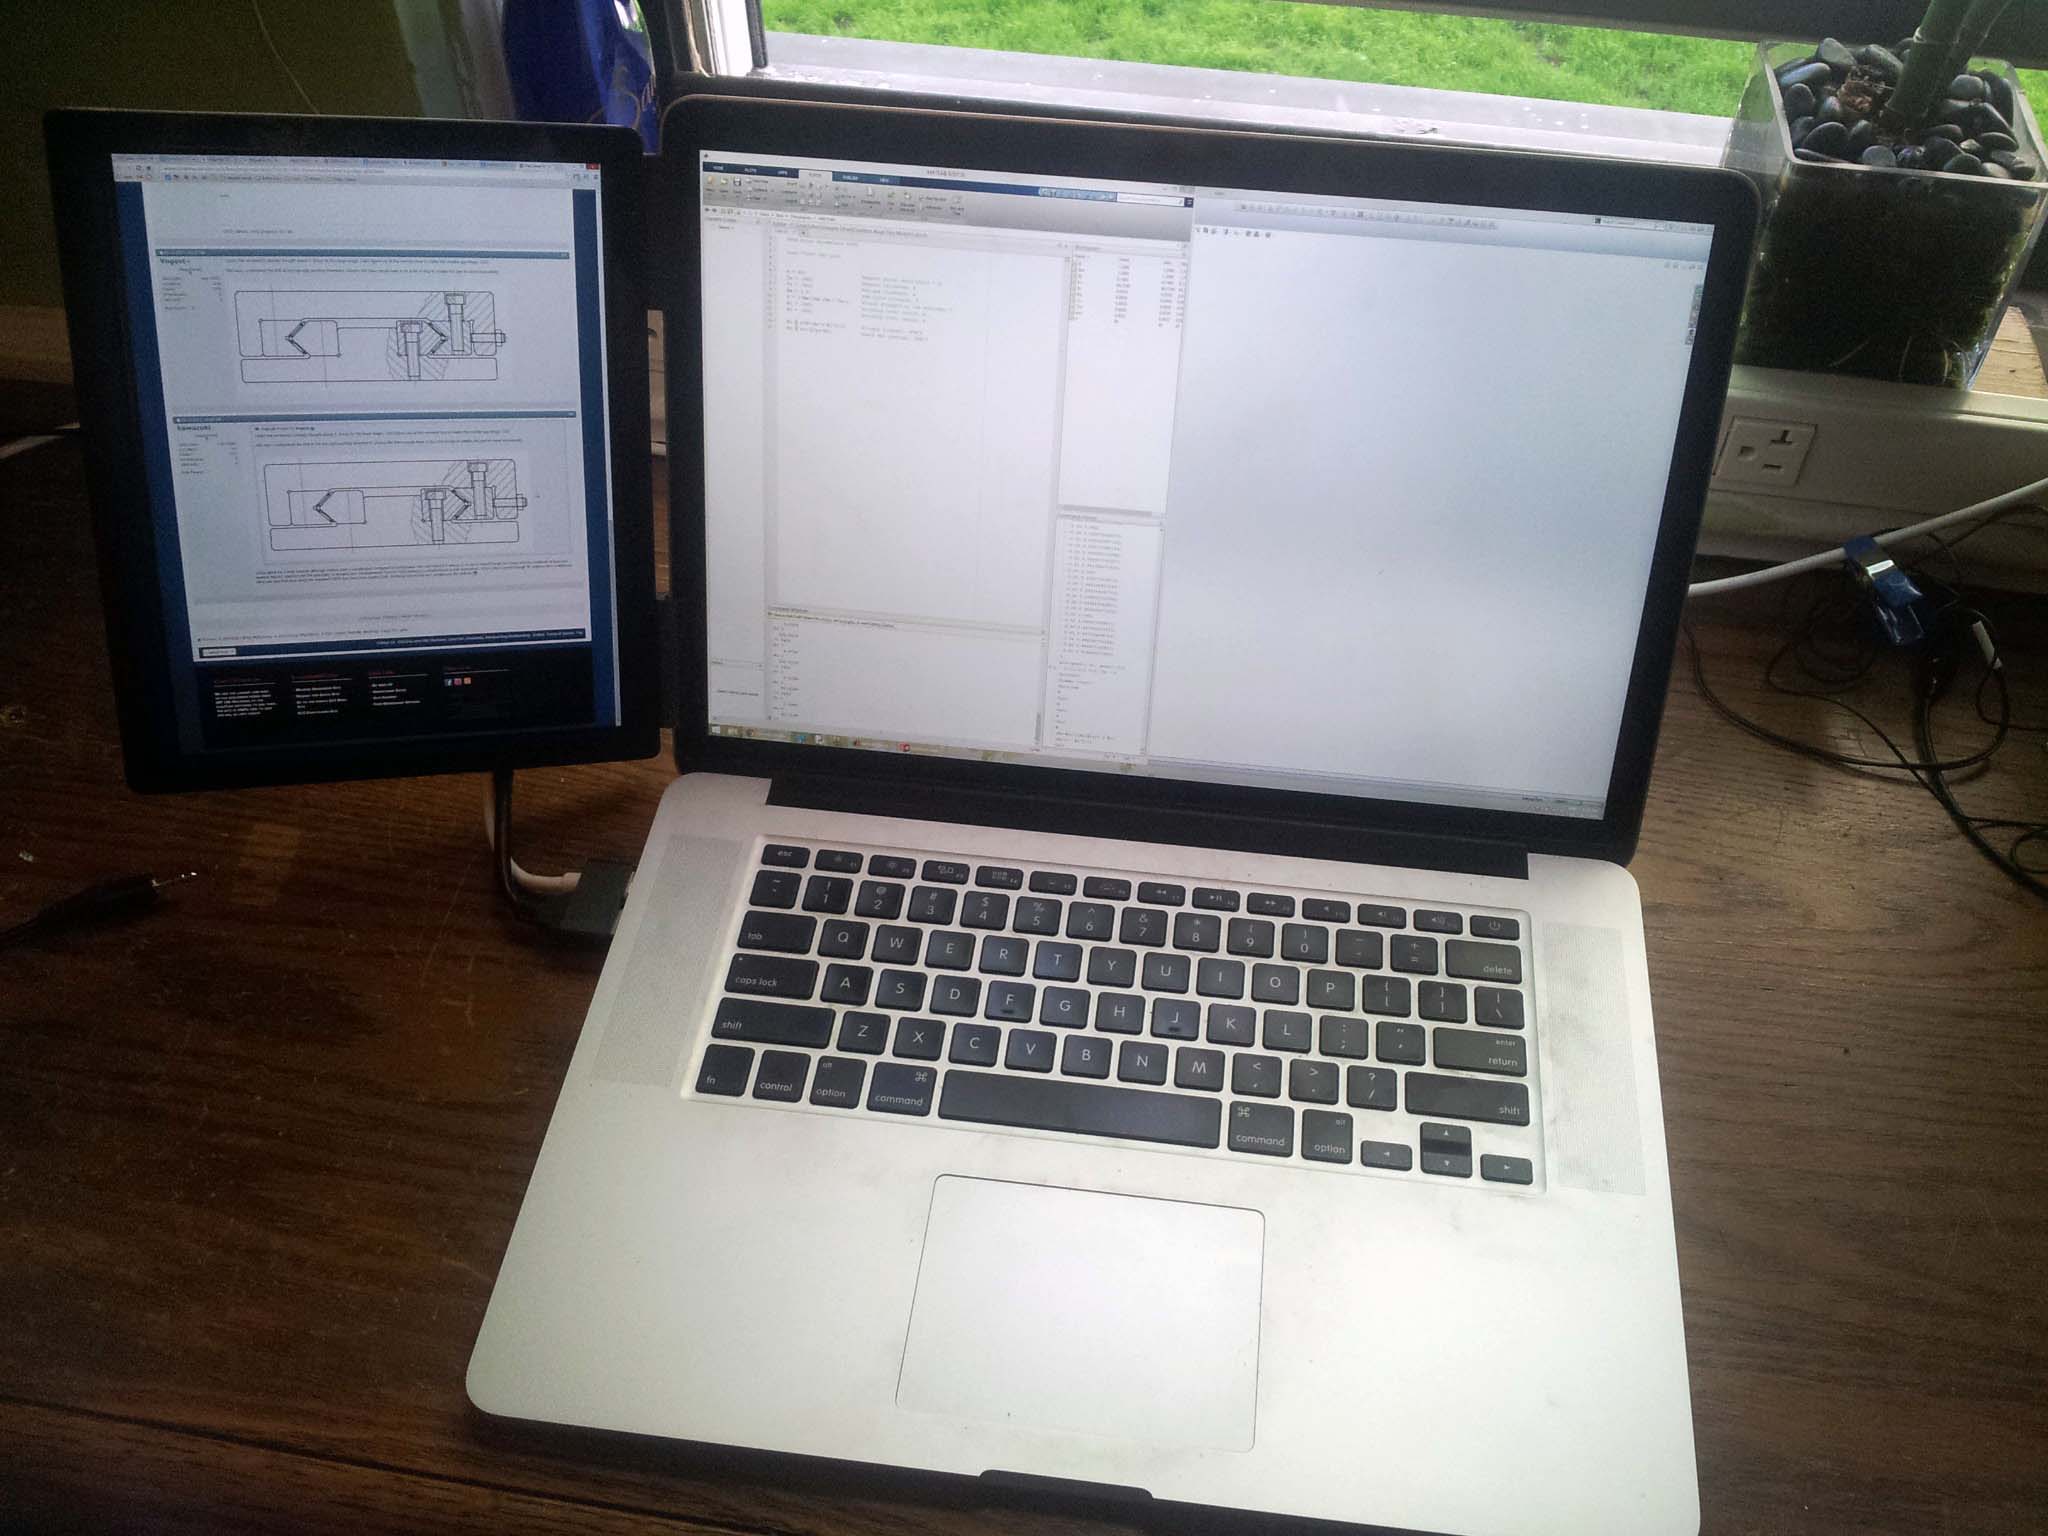
The assembly installed on my laptop:
I first laser cut a bezel for the screen out of some thick black acrylic. I then milled out a recess for the screen in the acrylic bezel. I fixed the acrylic to the mill using this fancy milling fixture I machined a while back.
Rather than trying to desolder the Displayport jack from the LCD controller, I instead just cut and spliced a Displayport cable down to 8". Same with the USB 3 cable. Tip: Splicing Displayport cables is terrible. There's an absurd amount of shielding, along with the ~20 conductors you have to deal with. Avoid if possible.
The thickest part of the entire assembly is connectors. If this project was redone without internal connectors and with custom lower-profile electronics, it could easily be built to iPad-thickness.
For the back panel, I used the side panel of a PowerMac G5 case. The 1/8" thick aluminum sheet is absolute overkill for this application, but I couldn't resist the anodized apple on the back. A more reasonable material may be the back of a broken macbook screen, which would be much thinner and lighter.
I briefly considered just gluing the entire assembly together (it would have been a very Apple thing to do) but then came to my senses and drilled and tapped some holes to screw it together. Eventually I'll get some flat cap screws and countersink them.
To turn the Mini Displayport and USB connector into one piece, I 3D-printed a housing the two connectors press-fit into, at the appropriate spacing for my laptop's ports:
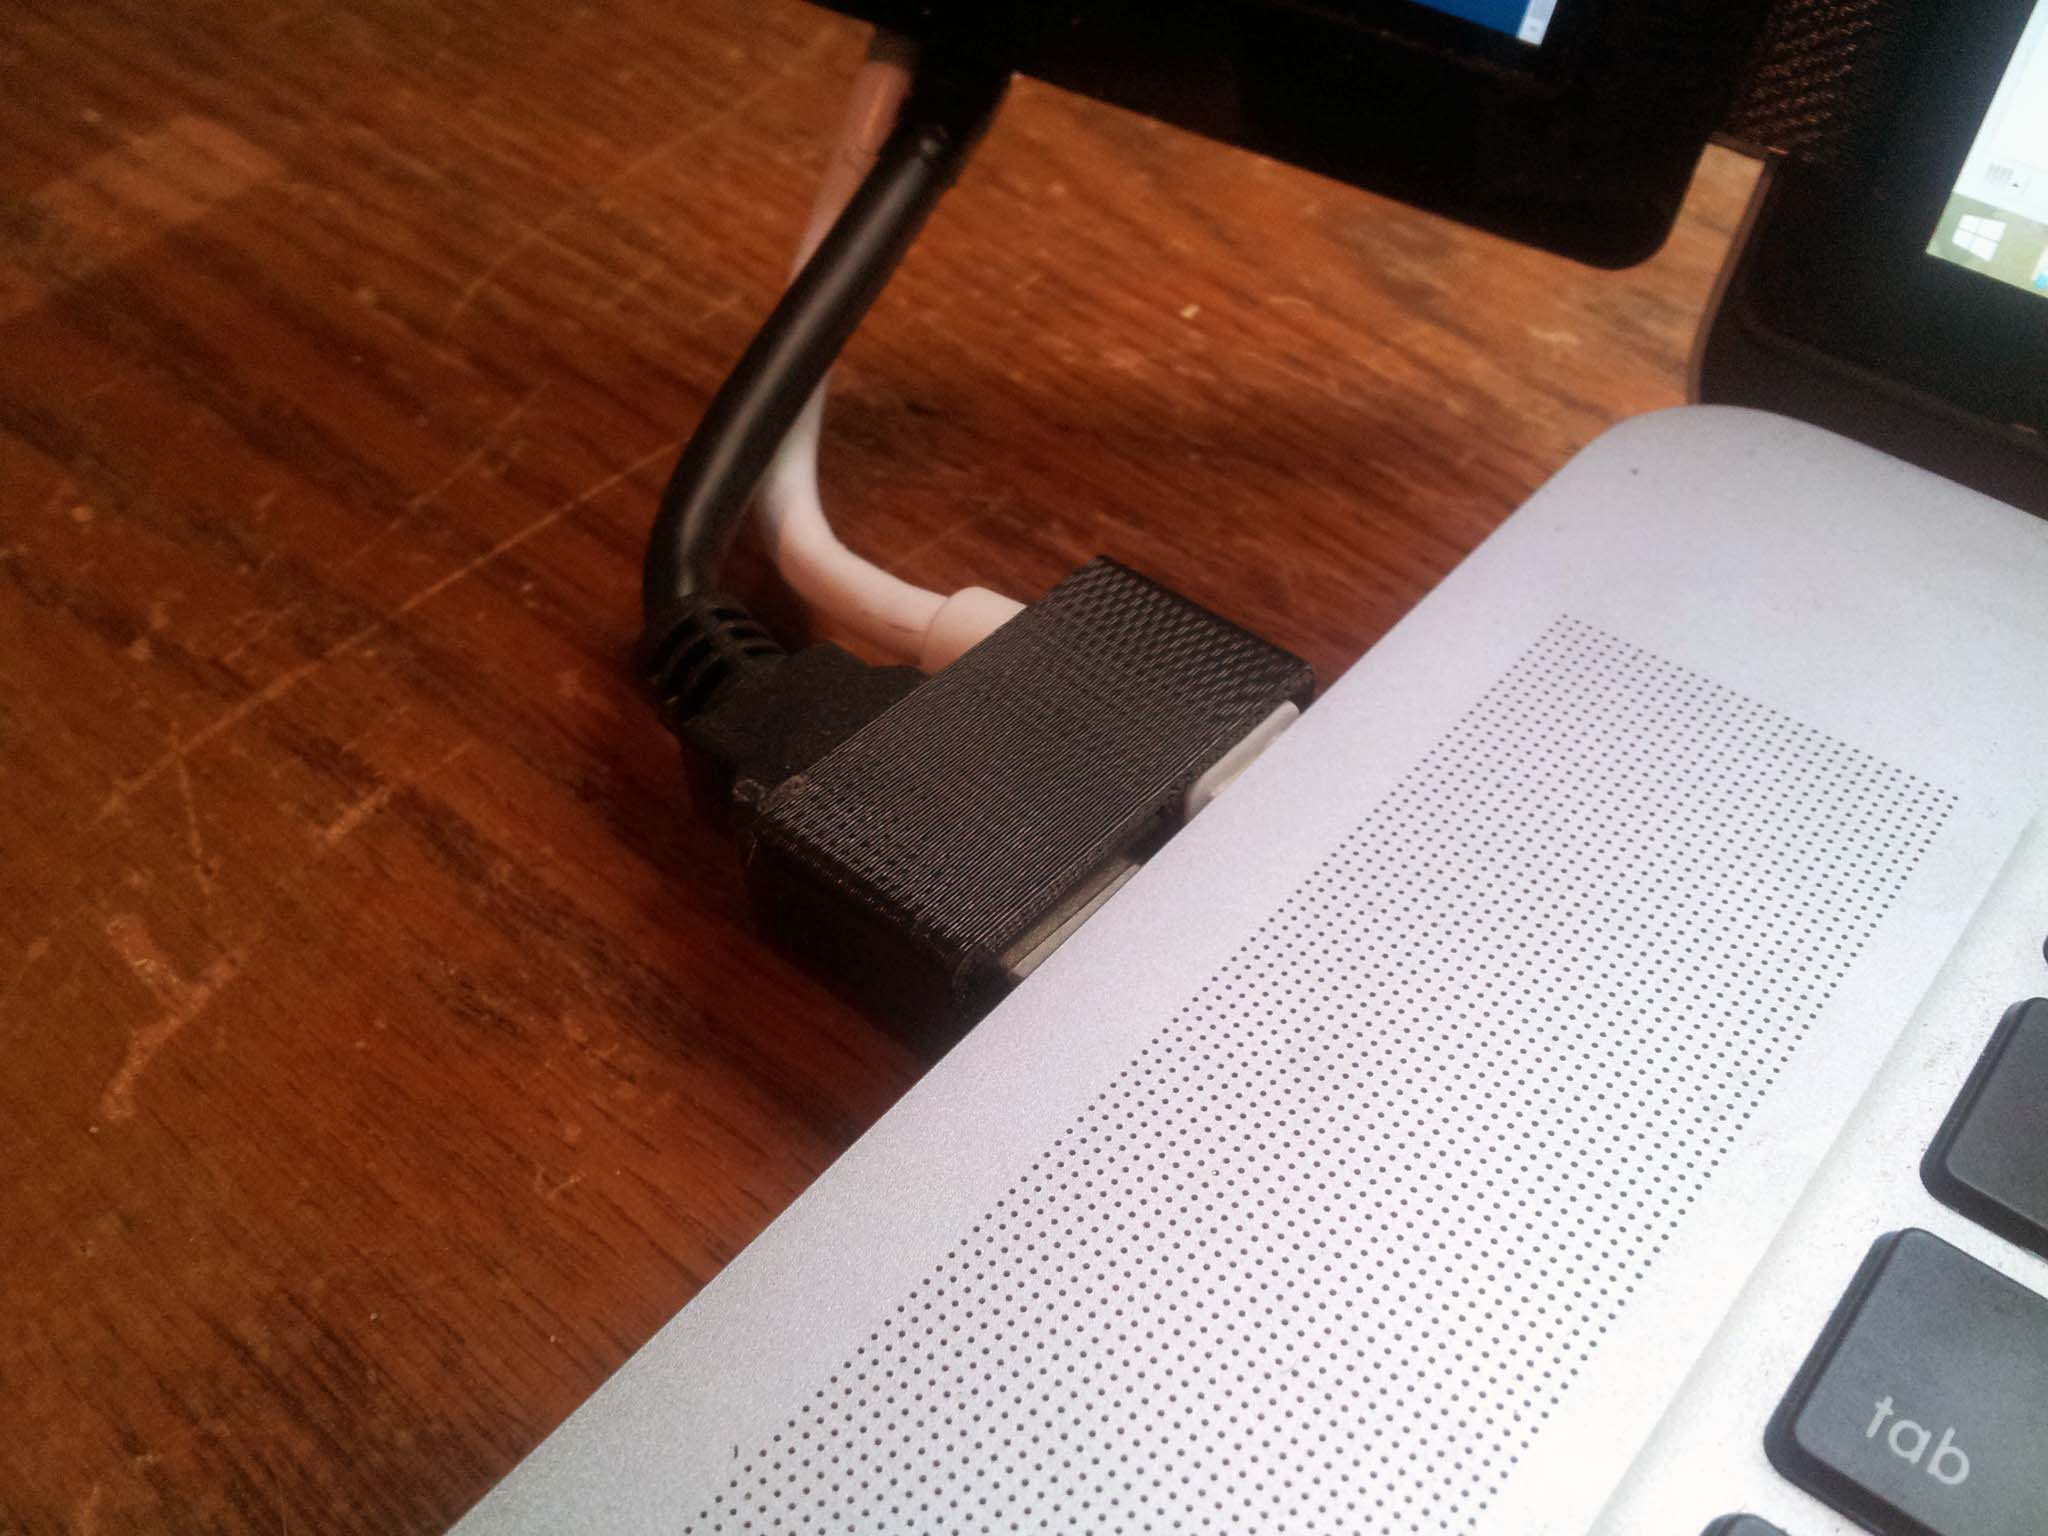
To attach the LCD to my laptop's built-in screen, I also went to my 3D printer and made these clips that friction-fit over my laptop's bezel. This way the LCD just presses onto the side of my laptop screen, and can be removed and installed in a matter of seconds. These printed clips were glued to the side of the acrylic bezel.
The assembly installed on my laptop:
Comments